Wednesday, April 4, 2012

What is Classical Education?


Since joining Classical Conversations three years ago, I have been learning about the classical education model.  What is it and how does it differ from how I was taught?  When I was applying for a directors position with CC, I  was asked to read and write a response of Dorothy Sayer's essay The Lost Tools of Learning.  It is exceptionally well written and I recommend reading it in full.  I wrote a cliff notes version of her essay and since it's a bit shorter I thought I'd share it here:

Response to Dorothy Sayer’s Essay The Lost Tools of Learning

In reviewing Dorothy Sayer’s essay, The Lost Tools of Learning, she delves into the problem of our modern educational system.  She states the main problem with modern education is that although we often succeed in teaching our pupils “subjects” we fail on the whole in teaching them how to think: they learn everything, except the art of learning.  Modern teaching methods teach subjects in isolation so the student has great difficulty making a mental connection between say, history and current economics.  She argues that if we are to produce a society of educated people, able to preserve their intellectual freedom in the midst of complex pressures of modern society, we must return to the proven teaching methods used for two millennia, the Trivium.

The Trivium is defined as a method of dealing with subjects intended to teach the students the proper use of the tools of learning before he begins to apply them to “subjects” at all.  The Trivium is by nature not learning but a preparation for learning.  The Trivium consists of three stages.  The first stage is Grammar.  This stage focuses on memorization, recitation, and observation.  Memory facts should include a historical timeline, Latin fundamentals as well as Science, Geography, English Grammar, Mathematics, and Theological facts. The second stage is Dialectic. Within this stage the students begin to understand all the facts they memorized in the Grammar stage.  It is in this stage when the students are shown all branches of learning to be interrelated.  Students will be taught reason and formal logic, which is defined as the art of arguing correctly.  The final stage is Rhetoric.  Now the trained mind is free to explore and apply all the facts that have been learned by rote and analyzed within the Dialectic stage.  It is a time to learn the science of communication and the art of expression.  Students are encouraged to begin specializing in subjects for which there is a natural disposition yet also continue with a few supplementary subjects to keep his mind open to the interrelations of all knowledge.  This stage culminates with the student learning to express himself in language and how to say what he has to say with elegance and persuasion.  

Still reading? Whew, almost done.

The integration of subjects is key within the Trivium.  It strings the isolated facts, which are memorized in the Grammar stage, together to make a meaningful whole.  Subjects are taught in relation to each other within a biblical worldview.  Ms. Sayer relates theology as the mistress-science without which the whole educational structure will necessarily lack its final synthesis.  The word mistress is defined as something regarded as feminine which has control and supremacy or something that directs or reigns.  Theology should, thus, be in the center directing and interrelating each subject to each other. 

In conclusion, Sayer states the tools for learning are the same and the person who knows how to use them will at any age obtain the mastery of a new subject in half the time and with a quarter of the effort.  The sole true end of education is simply this: to teach men how to learn for themselves; and whatever instruction fails to do this is effort expended in vain. 


Tuesday, March 13, 2012

Marshmallow Shooter Fun!

At our Classical Conversations classes this last Monday, the student presentation assignment was to demonstrate how to do or make something.  Jono decided he wanted to make a marshmallow shooter.  Zach had made one with a friend and Jono has been pining over wanting one for a long time.

So, YouTube to the rescue.  I found this video link - super easy and cheap!

Here are the basics supplies I bought and it made three guns:

1/2" PVC Pipe - it comes in 10ft sections
Elbow joints - no threading, 1/2 diameter, 2 per gun
T-joints - no threading, 1/2" diameter, 2 per gun
End caps - no threading,  1/2" diameter, 2 per gun
All my PVC and fittings cost $6.72 or $2.24 per gun - Oh yeah, cheap fun!
Mini marshmallows

Cut the PVC into:
4 - 3" segments
2 - 5" segments
1 - 7" segments

I used a miter box to cut the PVC and then a box knife to clean out the middle and a little sandpaper to file the ends smooth.

Arrange all your piece like so:


Have fun!!!

Tuesday, February 28, 2012

My little Sous Chefs

Last night I tried the Baked Ziti recipe from Whole Food Mommies.

Whole Food Mommies

It was a hit! I've been an epic failure when it comes to feeding my kids health options.  So, over the past few years we've been eliminating A LOT of processed foods and now we're working on adding back in whole foods.

Jeff and I had been really working on eating whole foods, but we hadn't been including our kids in the meals so it was just too much work.  Enter websites like Dr. Fuhrman's Eat to Live, Whole Food Mommies, Healthy Girl's Kitchen, and the Engine 2 Diet.

We find several recipes that we've tried with our kids and the results have been mixed,  but the baked ziti got raves reviews all around.

Click on this link for the recipe.

I used brown rice penne pasta instead whole wheat, I only used about 4 or 5 baby portabella mushrooms, 1/2 of a red pepper, and we didn't use the kale this time.  I'll probably try it next time though!
Other than those variances, I followed the recipe and it turned out great!

I added fresh green beans as a side.  Here are my sous chefs cutting up the green beans (Well, one is not so little anymore..):


Let me know if you try it!!

Tuesday, February 21, 2012

DIY: Birdie Art Work


I love unique art work.  I was looking through the Pottery Barn Kids catalog a few years ago and saw an adorable collection of birdie canvases.  Super cute, but the price wasn't so cute.  I wondered if it was something I could whip up on my own.  I searched the internet and found some templates.

I used this free Amy Butler template for the rooster, butterfly, and tall bird.  Did you know she has free sewing and craft patterns?  How cool is that?  It's the Nigella Silhouettes.  I didn't make the intended artwork, but the templates can be used for a variety of projects.


A bit of rick rack and a tiara make this tall birdie quite regal. 


This rooster got a sparkly eye and trimmed in some ribbon.


I found another template for the smaller birdies, but unfortunately the template is no longer available.  I traced the parts and scanned them in case you want to use them.  It's not professional, I'm sorry...  You should be able to click on the picture and print out the template.


I added a scrapbook embellishment to the bottom by the branch that looks like a little leaf.

Here I just flipped the pattern over and cut out a mirror image so I had two birdies facing opposite directions.  This little birdie got a gingham scarf in the form of a tied ribbon.  Hold the ends of the ribbon over a open flame, very carefully and not directly in the flame, to seal the ribbon so it doesn't fray. 


Here is the other bird template.  You can see the main body, then there are two wings, an oval belly part, tiny feet, tail, and a branch.  It's best to dry fit your pieces before you start glueing.   You can look at my finished bird below for a sample placement. 


The original tutorial I followed recommended artist canvas.  I happened to see some wooden blocks in my dad's garage that he was going to throw out.  I scooped them up, spray painted them white and they worked perfectly for this project.  I also think embroidery hoops would work great too!

After you select your templates, simply cut out the pieces using any scrapbook paper.  I used Heather Bailey's Pop Garden Scrapbook Paper for my project and used spray adhesive to attach them to the surface, but you could use any glue that allows the paper to lay flat.  Once everything is in place, start embellishing!  As a mentioned earlier, I used scrapbook embellishments to jazz up my little animals.
Rhinestone stickers became the eyes. Tied ribbons became little scarves. Ribbons bordering the bottom looks like a collar.

Get creative.  There's no right or wrong.  After I ran out of animal templates, I made one of the blocks a monogram of sorts.  It have a "K" along with cute other embellishments.


This was a super easy, quick, and inexpensive project.  Such a fun wall art collection that can be tailored to any decor!  Have fun!


Sunday, February 19, 2012

Can she be any cuter?

Kate is our only girl, and although she doesn't have a sister, that doesn't stop her from having a fab time.

Here she set up several of her Barbie's on the table and was just talking away to them.

Saturday, February 11, 2012

Last Minute Valentine Ideas

Well, it's the weekend before Valentine's Day and I'm short a Valentine box and cards for 25+ kiddos.  Yay, to Google and Pinterest!  I found this link to a cute mailbox.

Here's my version...


I used a post office box I had in the house, glued both ends together with Elmer's glue, painted two coats of red paint, carefully cut three sides with a box cutter, and hinged the back.  Then it was ready to decorate!


Kate and I made a quick shopping trip to Michael's where we found lots of Valentine's decorations 40% off.  Don't forget to check their website, they usually have coupons you can print out.  We found a cute lock and key, ribbon for the bottom, glitter hearts, and some cute flowers.  I printed out the MAIL portion on some scrapbook paper and applied it with double sided tape.  


I cut a small piece of ribbon to use for the closure and attached it with sticky foam dots.  Velcro dots would be better, but I was out.


I then poked two holes in the top with some scissors and fed some ribbon through for a handle. Ta-da, a super cute valentine box!

Now onto the valentine cards.  I really didn't want to do candy this year, so I saw this great post on Pinterest.  Her complete post was lovely, but I didn't have time to order an alphabet stamp and I don't have a cute little paper heart cutter.  Sooooo, I found some heart shaped silicone ice cube trays at Michael's and tried those for the crayons.  I bought the $1 box of 64 crayons and used a razor blade to take off the wrapper.  I used her suggestions to group the crayons by color families and made some camo ones for the boys and girlie ones for the girls.  I wasn't sure if the silicone would melt, so I baked them at 220 degrees for about 20 - 25 minutes.


I simply cut out some hearts from scrapbook paper and hand wrote the message, "You color my world" and her name. She's adding a few smiley faces, x's, and o's.  


Now I just hope it doesn't snow on Monday!!!  Happy Valentine's Day everyone!!!

xoxo


Tuesday, February 7, 2012

Capitol Day!


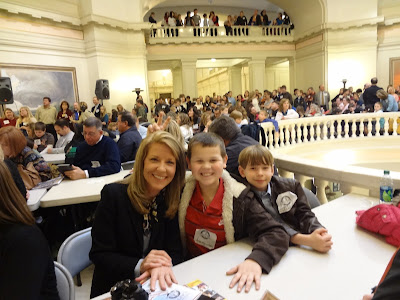
Today we traveled to Oklahoma City, our state capital, for the home educator's Capitol Day sponsored by OCHEC (Oklahoma Christian Home Educators' Consociation).  It was my first time to attend the event and it was a wonderful day!

Did you know that a homeschooling option was written into the Oklahoma State Constitution?  OCHEC has a saying that Capitol Day is the one day of the year when people come to the capitol to ask their legislators to doing nothing.

Governor Fallin addressed the packed rotunda.


We had a chance to meet Senator Dan Newberry and he was quite gracious to take us to the Senate lounge and talk with us for a little bit.  It's always fun to have a behind the scenes tour! 


Here is Veronica, her son Luke and Jono.

I believe this sculpture was called "The Guardian" 

Zach took a beautiful picture of the Capitol Building


The Rotunda was beautiful!


Shhh, don't tell him I told you but, Zach even recognized some Latin and partially translated it.  Woot, woot!!  So proud of him!

All in all, a great day at our Capitol and you never know the seeds that were planted today and what might become of them in 10 to 15 years....